使用 IDEFICS 进行图像任务
虽然可以通过微调专门模型来解决特定任务,但最近出现并广受欢迎的一种替代方法是使用大型模型来处理多种任务,而无需微调。例如,大型语言模型可以处理摘要、翻译、分类等自然语言处理任务。这种方法不再局限于单一模态(如文本),在本指南中,我们将展示如何使用一个名为 IDEFICS 的大型多模态模型来解决图像-文本任务。
IDEFICS 是基于 Flamingo 开发的一个开放访问的视觉和语言模型,Flamingo 是由 DeepMind 初始开发的一种最先进的视觉语言模型。该模型接受任意顺序的图像和文本输入,并生成连贯的文本输出。它可以回答有关图像的问题,描述视觉内容,基于多个图像创建故事等。IDEFICS 有两个版本:800 亿参数 和 90 亿参数,两个版本都可在 🤗 Hub 上找到。每个版本还提供了适应对话用例的微调指令版本。
这个模型非常多功能,可以用于各种图像和多模态任务。然而,作为一个大型模型,它需要大量的计算资源和基础设施。你可以根据自己的需求决定这种做法是否比为每个任务微调专门模型更适合。
在本指南中,你将学习如何:
- 加载 IDEFICS 和 加载量化版本的模型
- 使用 IDEFICS 进行:
- 批量模式下运行推理
- [以对话方式使用 IDEFICS](#以对话方式使用 IDEFICS)
在开始之前,请确保已安装所有必要的库。
pip install -q bitsandbytes sentencepiece accelerate transformers
checkpoint = "HuggingFaceM4/idefics-9b"
与其它 Transformers 模型一样,你需要从检查点加载处理器和模型本身。IDEFICS 处理器将 LlamaTokenizer 和 IDEFICS 图像处理器封装到单个处理器中,以便准备文本和图像输入。
import torch
from transformers import IdeficsForVisionText2Text, AutoProcessor

processor = AutoProcessor.from_pretrained(checkpoint)
model = IdeficsForVisionText2Text.from_pretrained(checkpoint, torch_dtype=torch.bfloat16, device_map="auto")
将 device_map 设置为 "auto" 将自动确定如何在现有设备上以最优化的方式加载和存储模型权重。
量化模型
如果高内存 GPU 可用性是一个问题,你可以加载模型的量化版本。要以 4 位精度加载模型和处理器,可以在 from_pretrained 方法中传递 BitsAndBytesConfig,模型将在加载时动态压缩。
import torch
from transformers import IdeficsForVisionText2Text, AutoProcessor, BitsAndBytesConfig

quantization_config = BitsAndBytesConfig(
    load_in_4bit=True,
    bnb_4bit_compute_dtype=torch.float16,
)

processor = AutoProcessor.from_pretrained(checkpoint)

model = IdeficsForVisionText2Text.from_pretrained(
    checkpoint,
    quantization_config=quantization_config,
    device_map="auto"
)
现在你已经以建议的方式之一加载了模型,让我们继续探索可以使用 IDEFICS 完成的任务。
图像描述
图像描述的任务是为给定图像预测一个描述。一个常见的应用是帮助视障人士导航不同的情境,例如在线浏览图像内容。
为了说明任务,获取一张要描述的图像,例如:
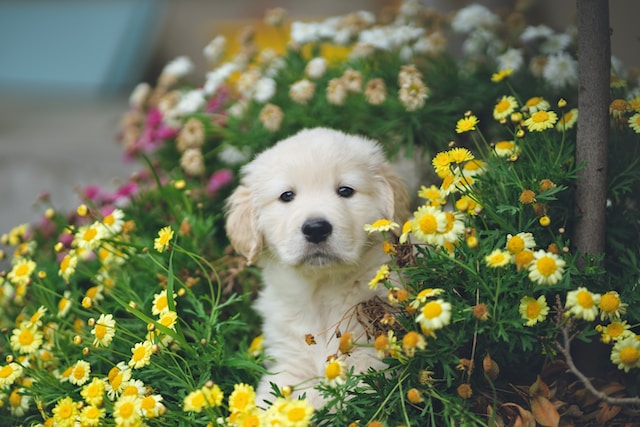
照片来源:Hendo Wang。
IDEFICS 接受文本和图像提示。但是,为了描述图像,你不需要向模型提供文本提示,只需提供预处理后的输入图像即可。没有文本提示时,模型将从 BOS(序列开始)标记开始生成文本,从而创建描述。
作为模型的图像输入,你可以使用图像对象(PIL.Image)或从其中检索图像的 URL。
prompt = [
    "https://images.unsplash.com/photo-1583160247711-2191776b4b91?ixlib=rb-4.0.3&ixid=M3wxMjA3fDB8MHxwaG90by1wYWdlfHx8fGVufDB8fHx8fA%3D%3D&auto=format&fit=crop&w=3542&q=80",
]

inputs = processor(prompt, return_tensors="pt").to("cuda")
bad_words_ids = processor.tokenizer(["<image>", "<fake_token_around_image>"], add_special_tokens=False).input_ids

generated_ids = model.generate(**inputs, max_new_tokens=10, bad_words_ids=bad_words_ids)
generated_text = processor.batch_decode(generated_ids, skip_special_tokens=True)
print(generated_text[0])
在调用 generate 时包含 bad_words_ids 是一个好主意,以避免在增加 max_new_tokens 时出现错误:当模型没有生成图像时,它会尝试生成新的 <image> 或 <fake_token_around_image> 标记。你可以像本指南中那样即时设置,也可以将其存储在 GenerationConfig 中,如 文本生成策略 指南所述。
有提示的图像描述
你可以通过提供文本提示来扩展图像描述,模型将根据图像继续生成文本。让我们再取一张图像来说明:

照片来源:Denys Nevozhai。
文本和图像提示可以作为单个列表传递给模型的处理器,以创建适当的输入。
prompt = [
    "https://images.unsplash.com/photo-1543349689-9a4d426bee8e?ixlib=rb-4.0.3&ixid=M3wxMjA3fDB8MHxwaG90by1wYWdlfHx8fGVufDB8fHx8fA%3D%3D&auto=format&fit=crop&w=3501&q=80",
    "This is an image of ",
]

inputs = processor(prompt, return_tensors="pt").to("cuda")
bad_words_ids = processor.tokenizer(["<image>", "<fake_token_around_image>"], add_special_tokens=False).input_ids

generated_ids = model.generate(**inputs, max_new_tokens=10, bad_words_ids=bad_words_ids)
generated_text = processor.batch_decode(generated_ids, skip_special_tokens=True)
print(generated_text[0])
少量样本提示
尽管 IDEFICS 在零样本任务中表现出色,但你的任务可能需要某种特定格式的描述,或者带有其他限制或要求,这增加了任务的复杂性。少量样本提示可以用于上下文学习。通过在提示中提供示例,你可以引导模型生成类似给定示例的结果。
让我们使用前一张埃菲尔铁塔的图像作为模型的示例,并构建一个提示,告诉模型除了学习图像中的对象外,我们还想获得一些有趣的信息。然后,让我们看看是否可以为自由女神像的图像获得相同的响应格式:
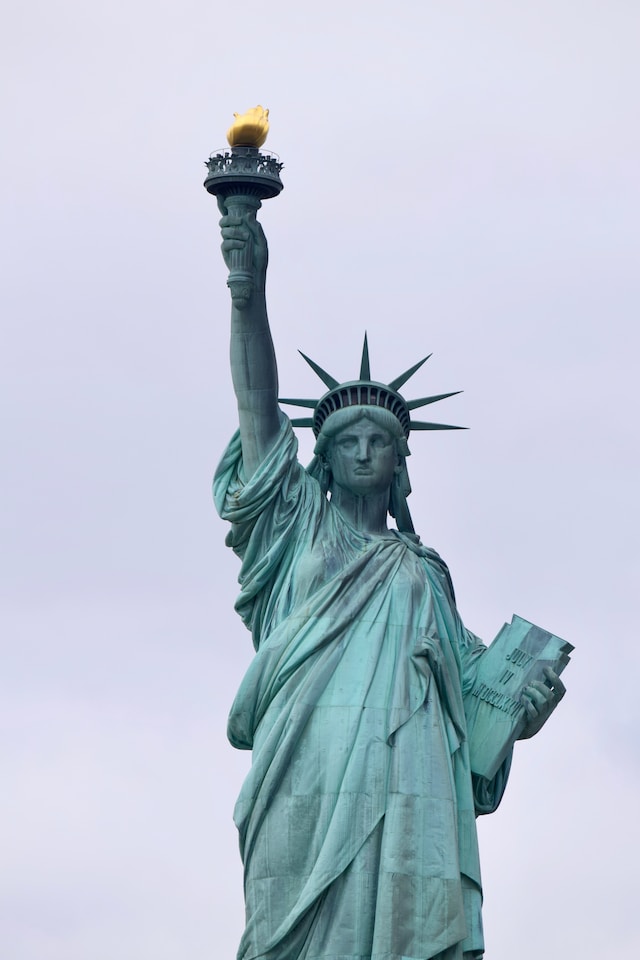
照片来源:Juan Mayobre。
prompt = ["User:",
          "https://images.unsplash.com/photo-1543349689-9a4d426bee8e?ixlib=rb-4.0.3&ixid=M3wxMjA3fDB8MHxwaG90by1wYWdlfHx8fGVufDB8fHx8fA%3D%3D&auto=format&fit=crop&w=3501&q=80",
          "Describe this image.\nAssistant: An image of the Eiffel Tower at night. Fun fact: the Eiffel Tower is the same height as an 81-storey building.\n",
          "User:",
          "https://images.unsplash.com/photo-1524099163253-32b7f0256868?ixlib=rb-4.0.3&ixid=M3wxMjA3fDB8MHxwaG90by1wYWdlfHx8fGVufDB8fHx8fA%3D%3D&auto=format&fit=crop&w=3387&q=80",
          "Describe this image.\nAssistant:"
          ]

inputs = processor(prompt, return_tensors="pt").to("cuda")
bad_words_ids = processor.tokenizer(["<image>", "<fake_token_around_image>"], add_special_tokens=False).input_ids

generated_ids = model.generate(**inputs, max_new_tokens=30, bad_words_ids=bad_words_ids)
generated_text = processor.batch_decode(generated_ids, skip_special_tokens=True)
print(generated_text[0])
请注意,仅通过一个示例(即 1-shot),模型就学会了如何执行任务。对于更复杂的任务,你可以尝试使用更多的示例(例如 3-shot、5-shot 等)。
视觉问答
视觉问答(VQA)的任务是基于图像回答开放式问题。类似于图像描述,它可以用于辅助技术应用程序,但也可用于教育(对视觉材料进行推理)、客户服务(基于图像回答产品问题)和图像检索。
让我们获取一张新图像用于此任务:

照片来源:Jarritos Mexican Soda。
你可以通过适当的指令引导模型从图像描述转向视觉问答:
prompt = [
    "Instruction: Provide an answer to the question. Use the image to answer.\n",
    "https://images.unsplash.com/photo-1623944889288-cd147dbb517c?ixlib=rb-4.0.3&ixid=M3wxMjA3fDB8MHxwaG90by1wYWdlfHx8fGVufDB8fHx8fA%3D%3D&auto=format&fit=crop&w=3540&q=80",
    "Question: Where are these people and what's the weather like? Answer:"
]

inputs = processor(prompt, return_tensors="pt").to("cuda")
bad_words_ids = processor.tokenizer(["<image>", "<fake_token_around_image>"], add_special_tokens=False).input_ids

generated_ids = model.generate(**inputs, max_new_tokens=20, bad_words_ids=bad_words_ids)
generated_text = processor.batch_decode(generated_ids, skip_special_tokens=True)
print(generated_text[0])
图像分类
IDEFICS 能够在未显式训练包含这些类别标签的数据的情况下,将图像分类到不同类别中。给定一个类别列表,利用其图像和文本理解能力,模型可以推断图像可能属于哪个类别。
假设我们有这张蔬菜摊的照片:
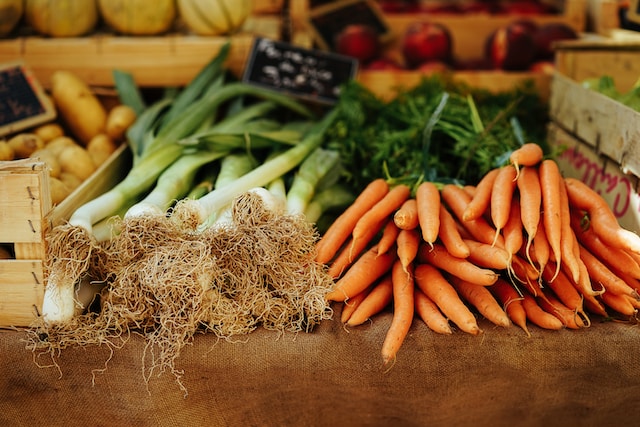
照片来源:Peter Wendt。
我们可以指示模型将图像分类到我们提供的类别之一:
categories = ['animals', 'vegetables', 'city landscape', 'cars', 'office']
prompt = [f"Instruction: Classify the following image into a single category from the following list: {categories}.\n",
          "https://images.unsplash.com/photo-1471193945509-9ad0617afabf?ixlib=rb-4.0.3&ixid=M3wxMjA3fDB8MHxwaG90by1wYWdlfHx8fGVufDB8fHx8fA%3D%3D&auto=format&fit=crop&w=3540&q=80",
          "Category: "
]

inputs = processor(prompt, return_tensors="pt").to("cuda")
bad_words_ids = processor.tokenizer(["<image>", "<fake_token_around_image>"], add_special_tokens=False).input_ids

generated_ids = model.generate(**inputs, max_new_tokens=6, bad_words_ids=bad_words_ids)
generated_text = processor.batch_decode(generated_ids, skip_special_tokens=True)
print(generated_text[0])
在上面的例子中,我们指示模型将图像分类到一个类别中,但你也可以提示模型进行排名分类。
基于图像的文本生成
对于更具创意的应用,你可以使用基于图像的文本生成来根据图像生成文本。这可以用于创建产品描述、广告、场景描述等。
让我们提示 IDEFICS 根据一张简单的红门照片编写一个故事:
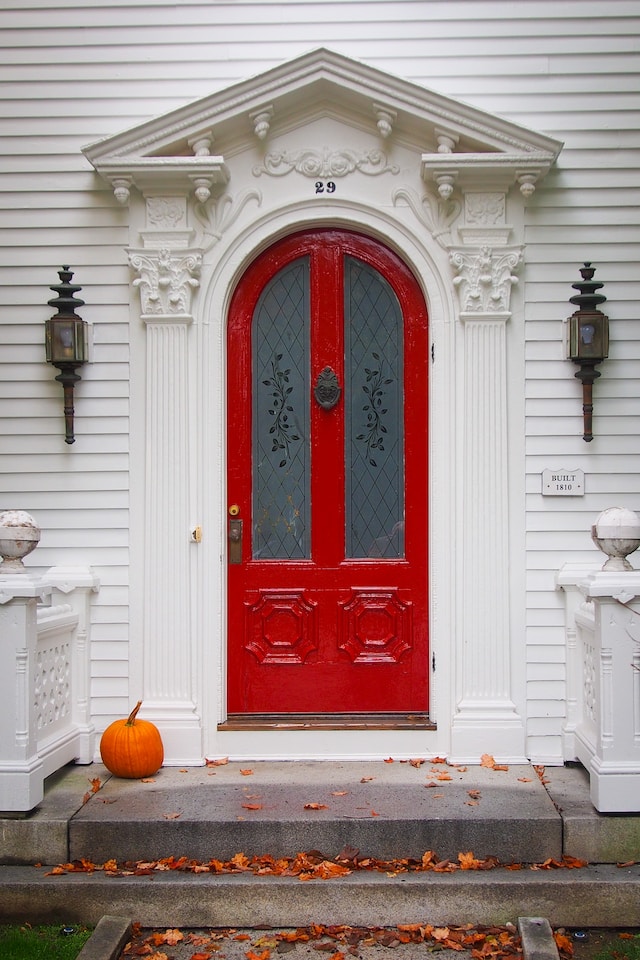
照片来源:Craig Tidball。
prompt = ["Instruction: Use the image to write a story. \n",
          "https://images.unsplash.com/photo-1517086822157-2b0358e7684a?ixlib=rb-4.0.3&ixid=M3wxMjA3fDB8MHxwaG90by1wYWdlfHx8fGVufDB8fHx8fA%3D%3D&auto=format&fit=crop&w=2203&q=80",
          "Story: \n"]

inputs = processor(prompt, return_tensors="pt").to("cuda")
bad_words_ids = processor.tokenizer(["<image>", "<fake_token_around_image>"], add_special_tokens=False).input_ids

generated_ids = model.generate(**inputs, num_beams=2, max_new_tokens=200, bad_words_ids=bad_words_ids)
generated_text = processor.batch_decode(generated_ids, skip_special_tokens=True)
print(generated_text[0])
prompts = [
    [
        "https://images.unsplash.com/photo-1543349689-9a4d426bee8e?ixlib=rb-4.0.3&ixid=M3wxMjA3fDB8MHxwaG90by1wYWdlfHx8fGVufDB8fHx8fA%3D%3D&auto=format&fit=crop&w=3501&q=80",
        "This is an image of ",
    ],
    [
        "https://images.unsplash.com/photo-1623944889288-cd147dbb517c?ixlib=rb-4.0.3&ixid=M3wxMjA3fDB8MHxwaG90by1wYWdlfHx8fGVufDB8fHx8fA%3D%3D&auto=format&fit=crop&w=3540&q=80",
        "This is an image of ",
    ],
    [
        "https://images.unsplash.com/photo-1471193945509-9ad0617afabf?ixlib=rb-4.0.3&ixid=M3wxMjA3fDB8MHxwaG90by1wYWdlfHx8fGVufDB8fHx8fA%3D%3D&auto=format&fit=crop&w=3540&q=80",
        "This is an image of ",
    ],
]

inputs = processor(prompts, return_tensors="pt").to("cuda")
bad_words_ids = processor.tokenizer(["<image>", "<fake_token_around_image>"], add_special_tokens=False).input_ids

generated_ids = model.generate(**inputs, max_new_tokens=10, bad_words_ids=bad_words_ids)
generated_text = processor.batch_decode(generated_ids, skip_special_tokens=True)
for i, t in enumerate(generated_text):
    print(f"{i}:\n{t}\n")
以对话方式使用 IDEFICS
对于对话用例,你可以在 🤗 Hub 上找到微调的指令版本模型:HuggingFaceM4/idefics-80b-instruct 和 HuggingFaceM4/idefics-9b-instruct。
这些检查点是在监督和指令微调数据集的混合数据上微调相应基础模型的结果,这提高了下游性能,同时使模型在对话环境中更具可用性。
对话用途的使用和提示与使用基础模型非常相似:
import torch
from transformers import IdeficsForVisionText2Text, AutoProcessor

device = "cuda" if torch.cuda.is_available() else "cpu"

checkpoint = "HuggingFaceM4/idefics-9b-instruct"
model = IdeficsForVisionText2Text.from_pretrained(checkpoint, torch_dtype=torch.bfloat16).to(device)
processor = AutoProcessor.from_pretrained(checkpoint)

prompts = [
    [
        "User: What is in this image?",
        "https://upload.wikimedia.org/wikipedia/commons/8/86/Id%C3%A9fix.JPG",
        "<end_of_utterance>",

        "\nAssistant: This picture depicts Idefix, the dog of Obelix in Asterix and Obelix. Idefix is running on the ground.<end_of_utterance>",

        "\nUser:",
        "https://static.wikia.nocookie.net/asterix/images/2/25/R22b.gif/revision/latest?cb=20110815073052",
        "And who is that?<end_of_utterance>",

        "\nAssistant:",
    ],
]

# --batched mode
inputs = processor(prompts, add_end_of_utterance_token=False, return_tensors="pt").to(device)
# --single sample mode
# inputs = processor(prompts[0], return_tensors="pt").to(device)

# Generation args
exit_condition = processor.tokenizer("<end_of_utterance>", add_special_tokens=False).input_ids
bad_words_ids = processor.tokenizer(["<image>", "<fake_token_around_image>"], add_special_tokens=False).input_ids

generated_ids = model.generate(**inputs, eos_token_id=exit_condition, bad_words_ids=bad_words_ids, max_length=100)
generated_text = processor.batch_decode(generated_ids, skip_special_tokens=True)
for i, t in enumerate(generated_text):
    print(f"{i}:\n{t}\n")